Student visa to USA
If you are going to study in the USA for more than a couple of weeks you usually need to apply for an F-1 student visa. Here we guide you through the application process step by step.
Please note that the US authorities can change the visa regulations at any time and different rules can apply to different countries so always double check the information at the official website for US Visas. We help you to the best of our knowledge but it is your responsibility to complete all the steps in the application process in accordance with the US guidelines and regulations.
Students who come to the United States on a student visa must have a primary purpose of studying and must study on a full-time basis. Students’ personal information provided may be made available to United States and individual state government agencies in compliance with local law. Your school is required by law to inform the United States government of any changes to the Student’s enrollment status or other changes of condition which may relate to visa status.
Below you find our eight-step guide on how to apply for a F1-student visa to the US:
1. Apply to a school and get an I-20
You need to be enrolled in a US school before you can apply for a student visa. Once a school has accepted you they will send you an I-20 document that you will need throughout the visa application process.
It is important that you check that your name and date of birth on your I-20 matches your passport. Otherwise, you will have to ask the school to change it and send you a new one.
This article focuses on the F1 student visa for long term studies in the US, but the process for a J1 exchange visitor visa is similar, but not identical. Instead of an I-20, J1 students will receive a DS-2019 form.
We can help you to find a suitable school and apply to language schools, colleges and universities in the US. Fill out our information request form to get help.
2. Pay the SEVIS-fee of $350
When you study in the US you will be enrolled in SEVIS, Student and Exchange Visitor Information System. To start your visa application you need to pay the SEVIS-fee of $350 at https://www.fmjfee.com/ You need to submit your SEVIS ID from your I-20 when you make the payment. Don’t forget to print a receipt of the payment!
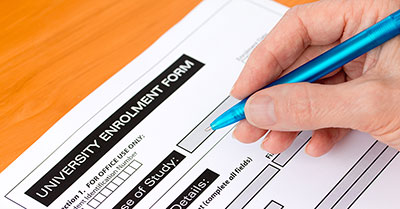
3. Fill in the DS-160 application online
The next step is to fill in the online application form DS-160. Here you have to fill in a lot of personal details (name, address, nationality etc) and answer questions about your health and criminal record. You also need to upload a photo. Eye glasses are not allowed. Read the requirements for the photo.
Remember to print the confirmation page with a barcode!
If you need to renew your passport you should do it before you start your DS-160 application since the passport number have to match with the one you bring to the interview under step 5. We recommend that your passport is valid for your entire stay so you don't have to renew it in the US. The passport should be valid at least 6 months beyond your period of stay in the United States if your nationality is not on the exception list.
4. Pay the application fee
When you have completed the DS-160 form you have to pay the visa application fee of $160. And no this is not the same as the SEVIS-fee (why make it easy when you can complicate things…) so the total cost of the visa is $510.
Choose your nearest US Embassy or Consulate surf their website to the F-1 Student Visa section. There you will find more information about the visa application fee payment. As usual, you should print the receipt, you will need the reference number of the payment in the next step.
5. Book an interview at the US Embassy
Once the application fee is paid you can proceed to book your interview on the Embassy link above. Waiting times can be long before the big start dates in January and August so book as soon as possible. You will need to input your passport number, your CGI-reference number from the application fee payment and the 10-digit barcode number from your DS-160 confirmation.
6. Prepare the documents for the interview
You will need to prepare a number of documents for the interview. Among those documents are:
- Your passport
- Your DS-160 confirmation page
- Receipt of payment for your visa application fee and your SEVIS-fee
- A photo according to the guidelines on the link above. This might not be needed if you successfully uploaded it online. Check what it says on your Embassy’s page about the interview documents.
- Your I-20
- Please note that some Embassies might require additional documents so make sure to check what it says on the website for the US Embassy or Consulate where you will apply
You should also bring supporting documents such as:
- Documents that support that you can pay for all educational, living and travel costs.
- Academic records such as transcripts, diplomas and test results (like TOEFL-score)
- Documents that prove that you still have ties to your home country and will return after your studies, e.g. return ticket, apartment contract, job contract, enrollment letter from a school etc.
7. The interview at the US embassy
At the US Embassy the person interviewing you will primarily check that:
- Your main purpose really is to study and that you have the skills needed to pass the program
- That you can pay for your expenses in the US
- That you intend to return home after you have finished your studies
- That you don’t pose a security risk
Make sure to bring the required documentation and read up on what is needed where you apply. Here you can find some questions to expect during your F1 visa interview.
8. Travel to the US
Your visa application will be approved or denied at the interview. If approved you should get your passport with the visa within 7 days of the interview in most countries. Then it is time to book your flight to the US if you have not already done so. When you have a F-1 student visa you don't need a return ticket so it is okay to book a single ticket. You can enter the US at the earliest 30 days before the course start stated on your I-20. Don’t forget to bring your I-20 in your carry-on luggage as you will need to show it at the immigrations control in the airport on arrival.
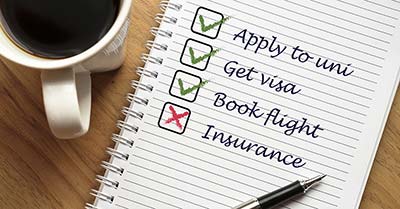
Don't forget to book a student insurance when you study in the US!
Disclaimer: Please note that the American authorities can make changes to the visa application process without notifying us. Different rules can apply to different nationalities so always read the instructions from the immigration authorities carefully. The information in the article above is correct to the best of our knowledge but we cannot be held responsible for any error that might occur without our knowledge. When in doubt always trust the official sources and check with them if needed.
More information
Read more about studying in the US, Community Colleges in the US and find universities and schools in the US in our school database.
Follow @dreamstudiesabroad on Facebook, Instagram, Tiktok, or Youtube to get updated about our new schools and articles.